Published
7 min read
Updated
Guarding Your Forms with Cloudflare's Turnstile: A Step-By-Step Guide
What you'll learn
Learn how to fortify your forms using Cloudflare's Turnstile for non-interactive captcha, and dive into code examples with a guide on client-side implementation and server-side verification with Cloudflare Workers.
Introduction
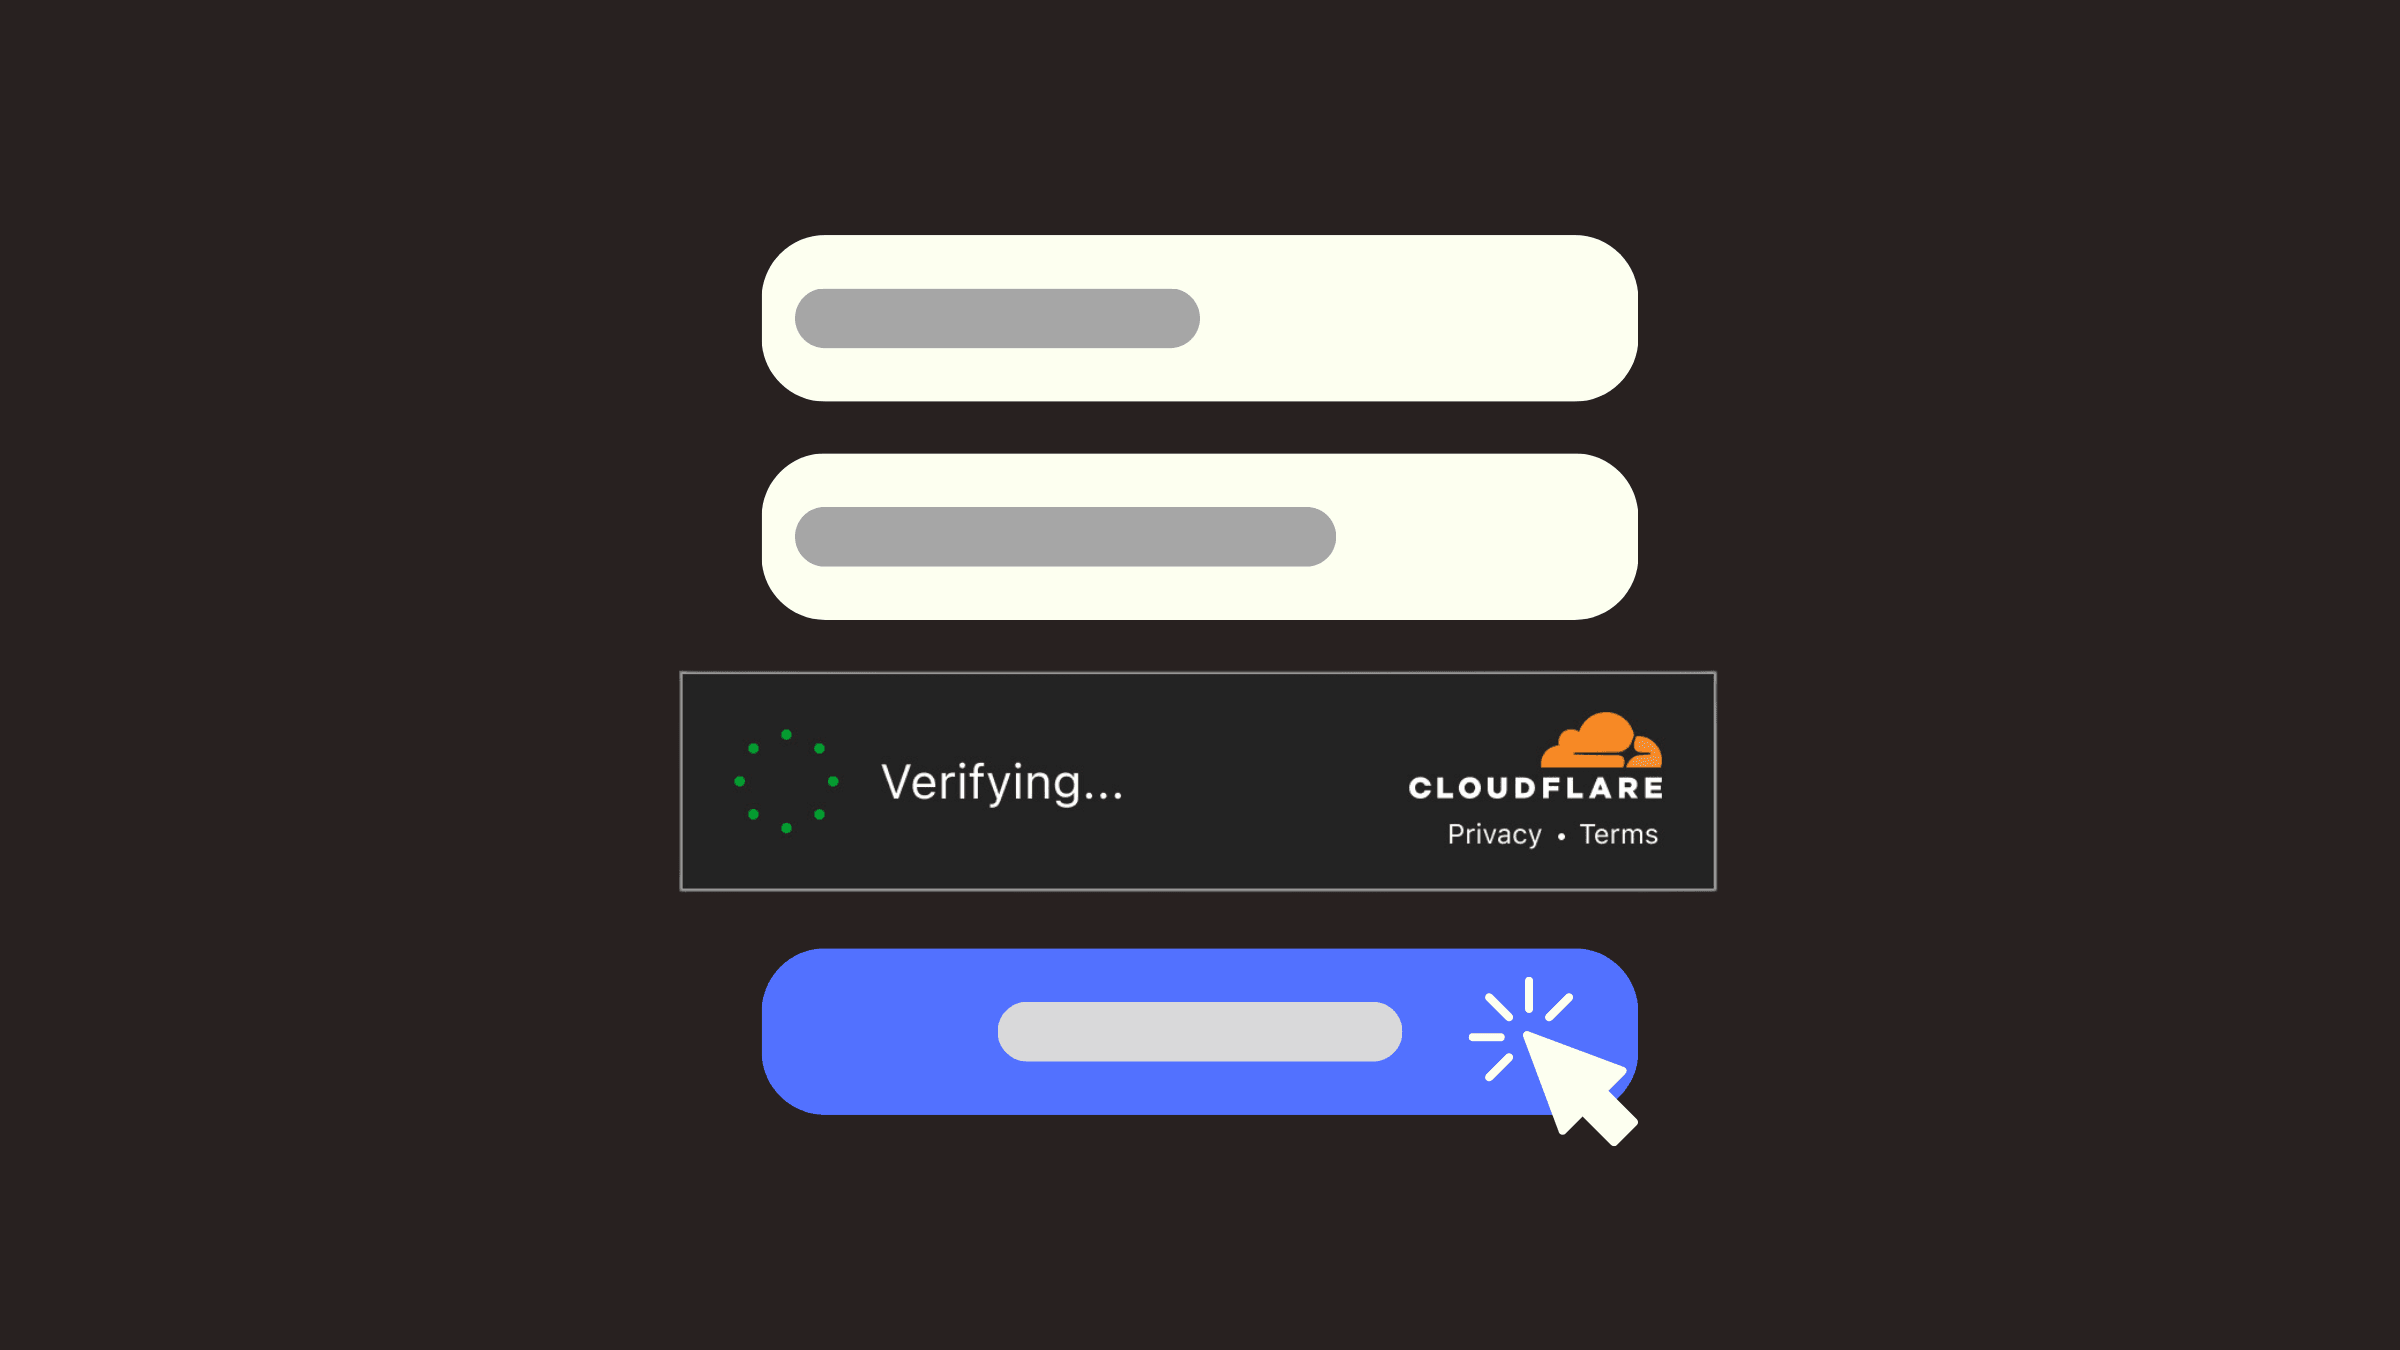
Securing web forms has become an increasingly pertinent issue in today’s digital landscape. With Cloudflare’s Turnstile, implementing non-interactive captchas to protect forms has never been easier.
This guide will walk you through a step-by-step process of integrating Cloudflare’s Turnstile into your forms for non-interactive captcha protection.
Here is a high-level overview of what is happening behind the scenes:
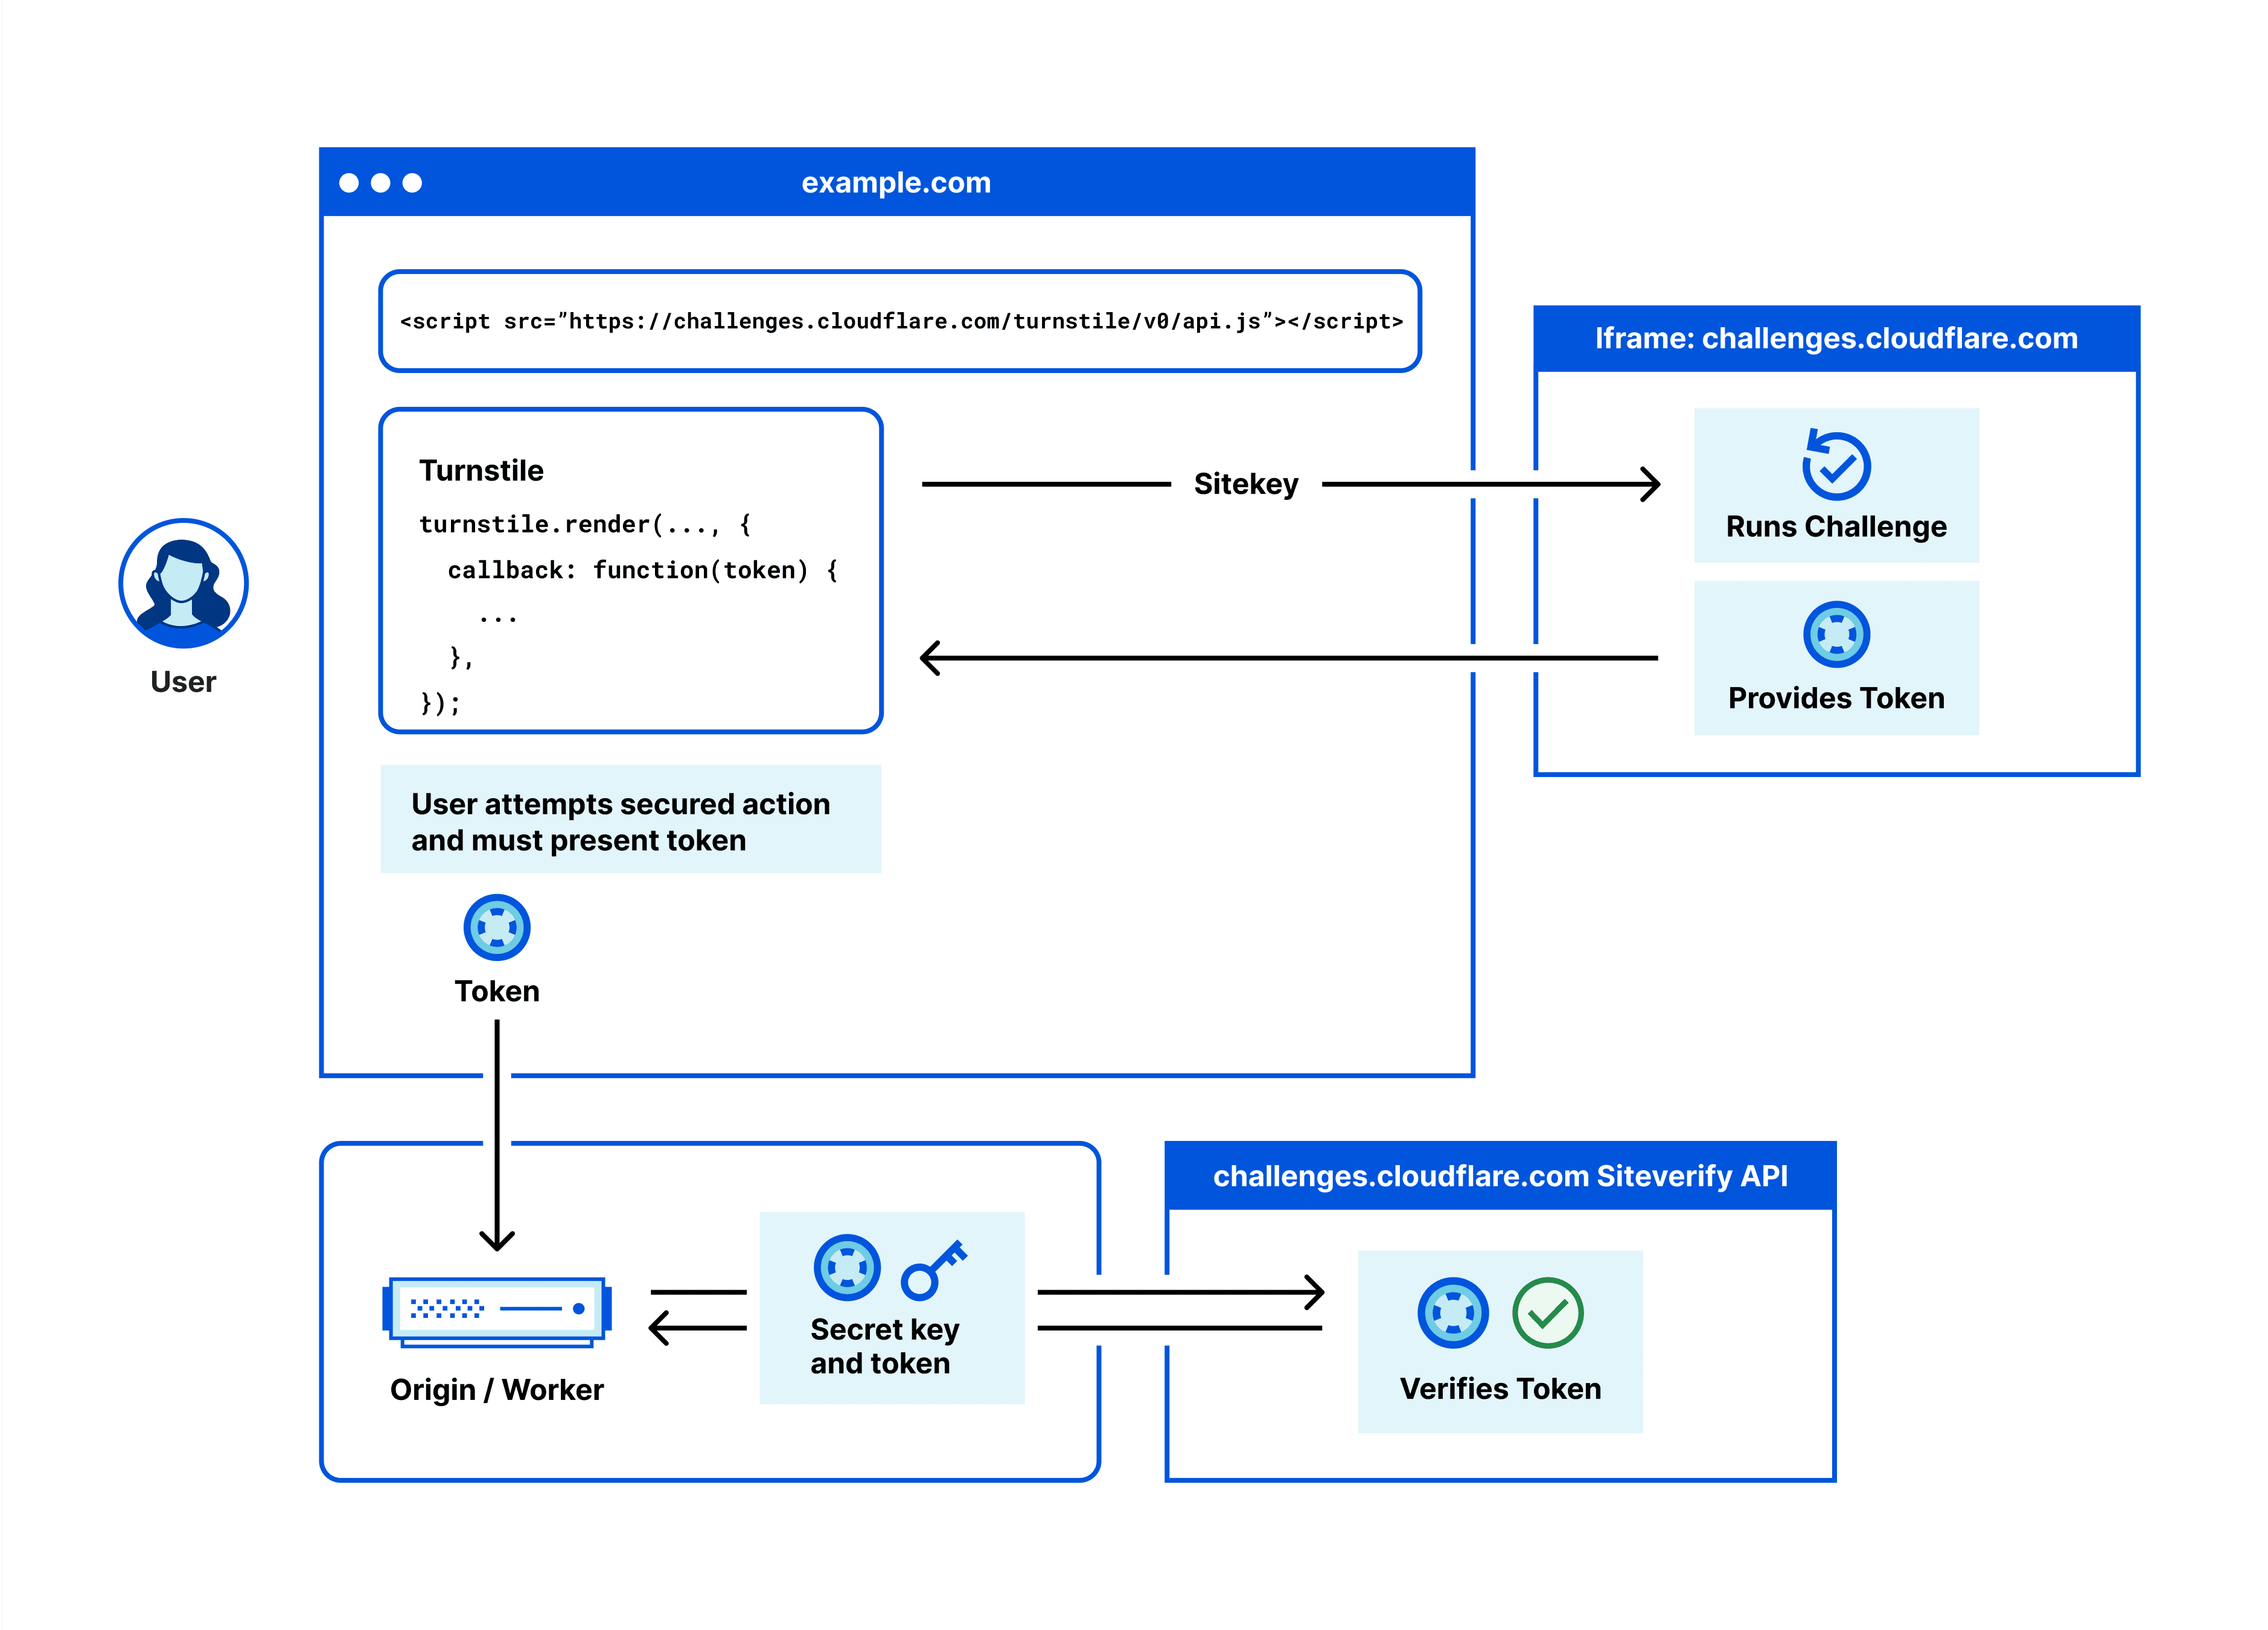
Taken from Cloudflare
Getting Started with Cloudflare’s Turnstile
Firstly, you’ll need a Cloudflare account. If you don’t have one, you can easily create a new account. If you’ve already registered, simply log in.
Once logged in, navigate to the Turnstile section via the left-hand navigation bar. Click to add a new site, giving it a descriptive name for ease of management. Next, add your domain - if you’re currently working locally, you can use ‘localhost’.
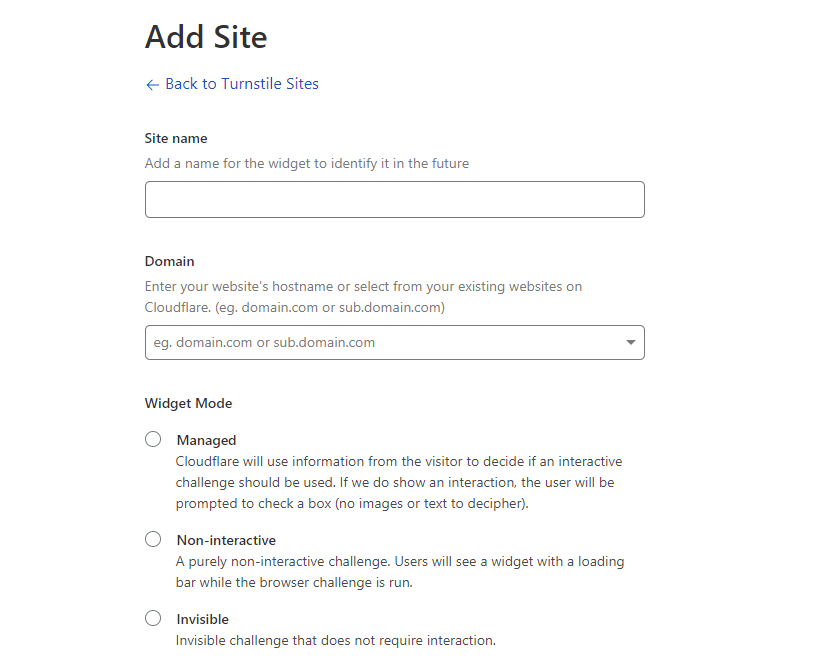
At this stage, you’ll need to select ‘Widget Mode’ - this will determine how your captcha behaves. You can choose from:
- Managed: Cloudflare uses visitor data to determine if an interactive challenge is required.
- Non-Interactive: Provides a completely non-interactive challenge.
- Invisible: Offers an invisible challenge that doesn’t require user interaction.
For this guide, we will be focusing on the non-interactive mode.
After completing these steps, you’ll receive a Site Key and a Secret Key.
The Site Key is used on the client side as a unique identifier, while the Secret Key is used on the server side to validate the client’s token.
Implementing on the Client Side with Next.js
With your keys in hand, you’re ready to start integrating Turnstile into your application. We will be using Next.js and creating a custom hook, allowing us to easily plug the captcha into any form.
Below is the custom hook:
import { useCallback, useEffect, useMemo, useState } from 'react'
import Script from 'next/script'

const TURNSTILE_PUBLIC_SITE_KEY = 'YOUR-SITE-KEY'

const useTurnstileCaptcha = () => {
	const [token, setToken] = useState()
	const [widgetId, setWidgetId] = useState()

	const content = useMemo(
		() => (
			<>
				<Script
					src='https://challenges.cloudflare.com/turnstile/v0/api.js?onload=onloadTurnstileCallback'
					strategy='lazyOnload'
					defer
					async
				/>
				<div id='cpt-trnstl-container' />
			</>
		),
		[]
	)

	const initializeCaptcha = () => {
		if (window && window?.turnstile) {
			const id = window.turnstile.render('#captcha-container', {
				sitekey: TURNSTILE_PUBLIC_SITE_KEY,
				callback: function (token) {
					setToken(token)
				}
			})
			setWidgetId(id)
		}
	}

	useEffect(() => {
		if (window) {
			window.onloadTurnstileCallback = initializeCaptcha
		}

		return () => {
			window.onloadTurnstileCallback = null
		}
	}, [])

	// Since the Next.js is a single page application
	// the captcha widget will not be re-rendered on route change
	// so we need to issue a re-render manually
	useEffect(() => {
		initializeCaptcha()
	}, [content])

	// This is the function that resets the captcha widget
	// which will give you a new token

	// routing to a new page will create a new widget with new widgetId
	// it is crucial to call the reset with the widgetId
	const resetWidget = useCallback(() => {
		if (window && window?.turnstile) {
			window.turnstile.reset(widgetId)
		}
	}, [widgetId])

	const validateCaptcha = useCallback(async () => {
		try {
			// This is the function that sends the token to your captcha verification service
			const verificationResponse = await fetch('YOUR-CAPTCHA-VERIFY-SERVICE-URL', {
				method: 'POST',
				headers: {
					'Content-Type': 'application/json'
				},
				body: JSON.stringify({
					token
				})
			})

			const verificationResponseJson = await verificationResponse.json()

			return verificationResponseJson?.data
		} catch (error) {
			return false
		}
	}, [token])

	return { content, token, validateCaptcha, resetWidget }
}

export default useTurnstileCaptcha
The hook is ready, let’s implement the server side to validate the captcha token.
Implementing on the Server Side with Cloudflare Workers
Having set up the client-side implementation, it’s time to create a server-side service that can validate the captcha. Cloudflare Workers offer a seamless way to accomplish this.
To create a new project with Cloudflare Workers, we’ll use the Wrangler CLI. Wrangler is a command-line tool for interacting with Cloudflare’s developer products. To install or update Wrangler, follow the instructions here.
Here’s an overview of how to set up the worker.
This is the entry point. The worker.js:
import apiRouter from './router'

export default {
	async fetch(request, env, ctx) {
		return apiRouter.handle(request, env)
	}
}
And, router.js:
import { Router } from 'itty-router'
import { verifyCaptcha } from './services/captcha'
import { generateCorsHeaders } from './corsHelper'

const router = Router()

// Add any other allowed origins here
const ALLOWED_ORIGINS = ['http://localhost:3000']

// Handle CORS preflight requests
router.options('*', (request) => {
	const origin = request.headers.get('Origin')

	if (ALLOWED_ORIGINS.includes(origin)) {
		return new Response(null, {
			headers: generateCorsHeaders(origin)
		})
	}

	return new Response(null, {
		headers: {
			Allow: 'OPTIONS'
		},
		status: 405
	})
})

// Handle captcha verification requests
router.post('/verify', async (request, env) => {
	const content = await request.json()
	const origin = request.headers.get('Origin')
	const ip = request.headers.get('CF-Connecting-IP')

	// env passed in from worker.js
	const secretKey = env.CAPTCHA_SECRET_KEY
	const token = content.token

	const verificationResult = await verifyCaptcha({ token, ip, secretKey })

	return new Response(JSON.stringify({ data: verificationResult }), {
		headers: generateCorsHeaders(origin)
	})
})

// 404 for everything else
router.all('*', () => new Response('Not Found.', { status: 404 }))

export default router
And, verifyCaptcha.js service:
const url = 'https://challenges.cloudflare.com/turnstile/v0/siteverify'

export const verifyCaptcha = async ({ token, ip, secretKey }) => {
	const formData = new FormData()

	formData.append('secret', secretKey)
	formData.append('response', token)
	formData.append('remoteip', ip)

	try {
		const result = await fetch(url, {
			body: formData,
			method: 'POST'
		})

		const outcome = await result.json()

		if (!outcome.success) {
			return false
		}

		return true
	} catch (error) {
		return false
	}
}
And, the corsHelper.js file:
export const generateCorsHeaders = (origin) => {
	const corsHeaders = {
		'Access-Control-Allow-Methods': 'POST,OPTIONS',
		'Access-Control-Max-Age': '86400',
		'Access-Control-Allow-Headers': 'Content-Type',
		'Access-Control-Allow-Credentials': 'true'
	}

	if (origin) {
		corsHeaders['Access-Control-Allow-Origin'] = origin
	}

	return corsHeaders
}
As the final step, we need to set the Secret Key. On the local development environment, we need to create a special file: .dev.vars:
CAPTCHA_SECRET_KEY=PASTE-YOUR-KEY-HEREYou can deploy the worker to Cloudflare with npm run deploy the command.
For production, you can set the key from the Cloudflare console. First, click on Workers & Pages tab and select your deployed worker. Then select Settings from the tab and finally pick Variables. Then, add your variable:
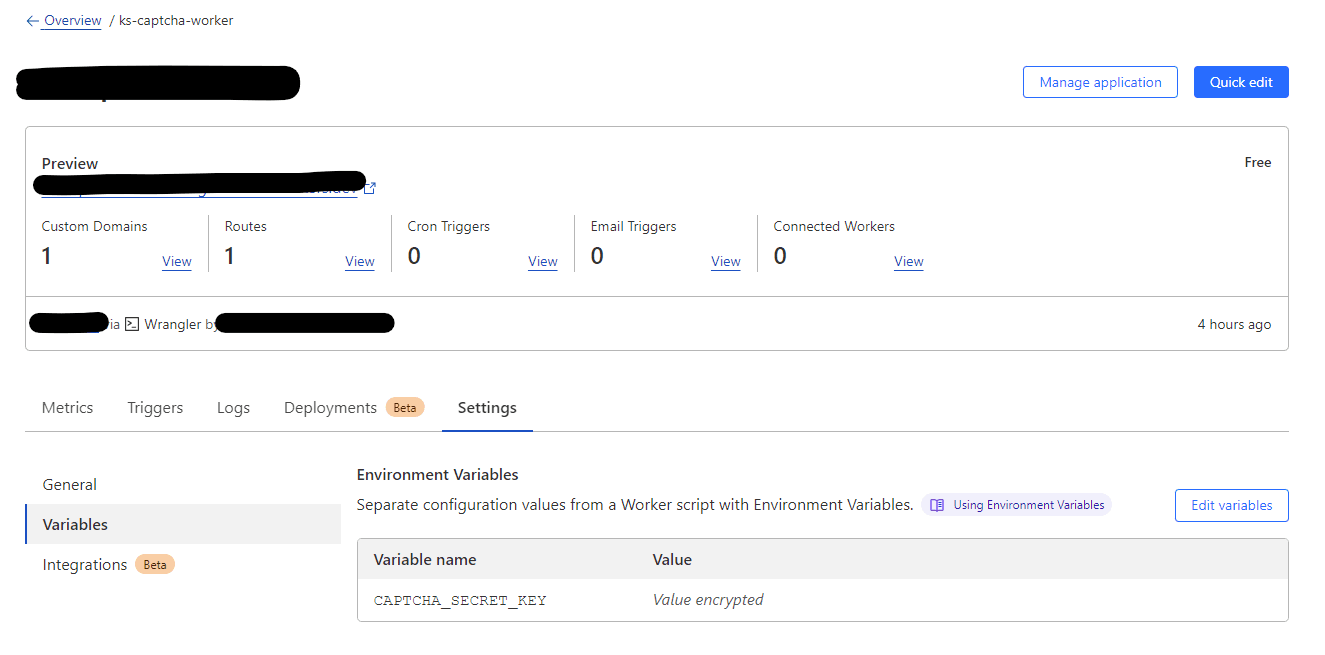
This will re-deploy your worker automatically to use the latest environment values.
Integrating into Your Form
With both the client and server side ready, you can now integrate the non-interactive captcha into your form.
Below is a simple example of a login form utilizing our custom hook:
import React from 'react'

const LoginForm = () => {
	const { content: captchaContent, validateCaptcha, resetWidget } = useTurnstileCaptcha()

	const handleFormSubmit = async (event) => {
		event.preventDefault()

		const captchaValidated = await validateCaptcha()

		if (!captchaValidated) {
			// Notice, we used invisible captcha, so we need to tell user
			// about the captcha validation failure
			alert('Captcha validation failed. Please try again.')

			// Reset captcha widget so that user can try again
			resetWidget()

			return
		}

		// User is validated, so we can proceed with form submission

		const { username, password } = event.target.elements

		// Do something with username and password
		// ...
	}

	return (
		<form>
			<input type='text' name='username' />
			<input type='password' name='password' />
			{captchaContent}
			<button type='submit' onClick={handleFormSubmit}>
				Submit
			</button>
		</form>
	)
}

export default LoginForm
FAQs
What is Cloudflare’s Turnstile?
Turnstile is a service provided by Cloudflare that offers captcha solutions to protect forms from spam and abuse. It offers different modes, including managed, non-interactive, and invisible captchas.
Why use non-interactive captchas?
Non-interactive captchas offer a seamless user experience as they do not require users to solve puzzles or identify images, while still providing protection against bots.
How does captcha validation work?
The captcha generates a unique token on the client side. This token is sent to the server side for validation, and if the validation is successful, it allows the form submission to proceed.
Conclusion
There you have it! By following this guide, you’ve learned how to implement non-interactive captchas into your forms using Cloudflare’s Turnstile.
Not only does this provide an additional layer of security for your forms, but it also improves the user experience by not requiring them to solve captchas manually.